 Accuracy Checks and Calibrations
Accuracy testing should be performed at least once per month to ensure the BAC readings are reliable. If the result of the accuracy test is not within the acceptable range, the unit must be re-calibrated by PAS Systems International, or by persons who have been properly trained for alcohol detector calibration.
Due to the sensitive nature of BAC testing, it is extremely important to keep detailed records of both accuracy tests and calibrations for each unit. Need a log book sheet email me
NOTE: A calibration is done once a year or as needed. the Accuracy check / Cal check is done once a month and after a yearly calibration and after a confirmed positive alcohol test at 0.020 or greater. never do an accuracy check / cal check after a screening test, only after the 2nd test (confirmation test at 0.020 or greater) and if the results are 0.19 or less you do not need to do a accuracy check / cal check after the confirmation alcohol test. High Altitude Correction Chart
|
|
|
|||||||||||
Ending in Serial Numbers 10400666 or higher GO HERE
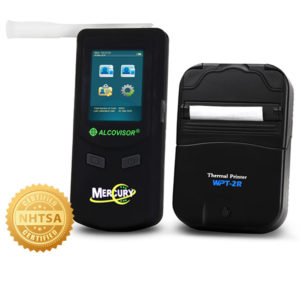
Accuracy Check for the Mercury Ending in Serial Numbers prior to 10400666 1.) Turn on the Mercury. Select the Standard Test icon and wait for the instrument to perform an Air Blank Test. Ensure that the Air Blank is 0.000. The unit will automatically advance to the test screen and “Please Blow” will be displayed.
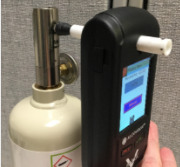
2.) Purge the dry gas tank by pressing down on the regulator for a few seconds. 3.) Place a new mouthpiece on the Mercury and Connect the Mercury to the regulator/valve of the gas cylinder. Note: Firmly press down on the mouthpiece to make sure the mouthpiece is securely attached to the Mercury.
4.) Press the gas regulator button, allowing gas to flow into the mouthpiece for 8-10 seconds. While still pressing on the gas, press the ‘Manual’ button on the screen to acquire a sample. The gas MUST be flowing into the mouthpiece while the sample is taken. Once you hear the pump click, indicating the sample has been taken, you can release your finger from the gas and remove the device from the regulator.
5.) After a few seconds, the measured value will be displayed. IF the measured value is within +/- 0.005 BrAC or your gas standard, the unit is working accurately.
6.) Record your results in your Accuracy Check/Calibration Check Log
https://youtu.be/itjq5bz7q98 you tube video
1.) Select the
Settings Icon
2.) Enter the Password. this password is in your user manual
3.) Select “Calibration”.
4.) Enter the concentration of the calibration solution. Accuracy should be to one decimal place. The preset unit is mg/100mL. For example, enter 80.0 for 80mg/100mL or enter 100.0 for a 0.100% and enter 40.0 for 0.040%. NOTE: Remember to use the High-Altitude Correction Chart (found in the Operating Manual) when calibrating the device using dry gas at locations above 500 feet in elevation.
5.) Select arrow to the lower right corner to confirm.
6.) The next screen to appear is the calibration screen. The first line shown is the concentration of the calibration solution. The second line is the temperature (22 to 28). The third line is the calibrated value (to be tested).
7.) Connect the Mercury to an approved dry gas tank, Use calibration adaptor tubes between the simulator (or cylinder) and mouthpiece to ensure an airtight fit. Allow cylinder to run for approximately (8 seconds for Dry Gas) and select the “Cal” button on the screen to acquire a sample. Remove from cylinder. The screen will briefly flash “Wait” and the calibrated value in the third line will be changed (this value is a mixture of letters and numbers).
8.) Select arrow to the lower right corner to finish calibration.
9.) Verify the calibration by performing an accuracy check test. If an accuracy check is performed through Advanced Settings, the results will not be saved, but the date the check was performed will be recorded.
|
|||||||||||
|
Alcovisor Mercury Accuracy Check and Calibration Ending in Serial Numbers 10400666 or higher |
|||||||||||

Monthly Accuracy Check/ Cal Check
The newer Mercury's - check here first before doing a cal check
the accuracy check you will do it from here. if this screen is taking you directly to do a calibration by asking the ml / mg then you have an older unit. |
|||||||||||
1.) Place a new mouthpiece on the Mercury and Connect the Mercury to the cylinder. Note: Firmly press down on the mouthpiece to make sure the mouthpiece is securely attached to the Mercury. 2.) Press the gas regulator button, allowing gas to flow into the mouthpiece for 8-10 seconds. While still pressing on the gas, press the Manual button to acquire a sample. The gas MUST be flowing into the mouthpiece while the sample is taken. Once you hear the pump click, indicating the sample has been taken, you can release your finger from the gas and remove the device from the regulator. 3.) After a few seconds, the measured value will be displayed. If the measured value is within +/- 0.005 BrAC or your gas standard, the unit is working accurately. 4.) Record your results in your Accuracy Check/Calibration Check Log. Need a log book sheet email me If performing an Accuracy Check immediately following calibration -
NOTE: A calibration is done once a year or as needed. the Accuracy check / Cal check is done once a month and after a yearly calibration and after a confirmed positive alcohol test at 0.020% or greater. never do an accuracy check / cal check after a screening test, only after the 2nd test (confirmation test at 0.020 or greater) and if the results are 0.19 or less you do not need to do a accuracy check / cal check after the confirmation alcohol test. |
|||||||||||
|
Alcovisor Jupiter Accuracy Check and Calibration |
|||||||||||
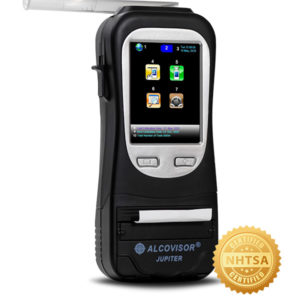
All of our Jupiter EBT's since 2019 have been manufactured with the new software to reflect the new screen shown Alcovisor Jupiter Accuracy Check and Calibration for devices with 4 Home Screen Icons
Performing an Accuracy Check (Your monthly Accuracy Check):
 1.) Place a new mouthpiece on the Jupiter and Connect the Jupiter to the cylinder. 2.) Press the gas regulator button, allowing gas to flow into the mouthpiece for 8-10 seconds. While still pressing on the gas, press the Manual button to acquire a sample. The gas MUST be flowing into the mouthpiece while the sample is taken. Once you hear the pump click, indicating the sample has been taken, you can release your finger from the gas and remove the device from the regulator. 3.) After a few seconds, the measured value will be displayed. If the measured value is within +/- 0.005 BrAC or your gas standard, the unit is working accurately. 4.) Record your results in your Accuracy Check/Calibration Check Log
|


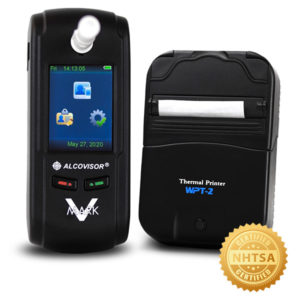
 Accuracy Check for the Mark V


 Go to the settings then cal icon, the pass word is 119119 if
you have a choice on this screen to do


